Why Your DIY Floating Shelves Sag (And What I Learned to Do Instead)
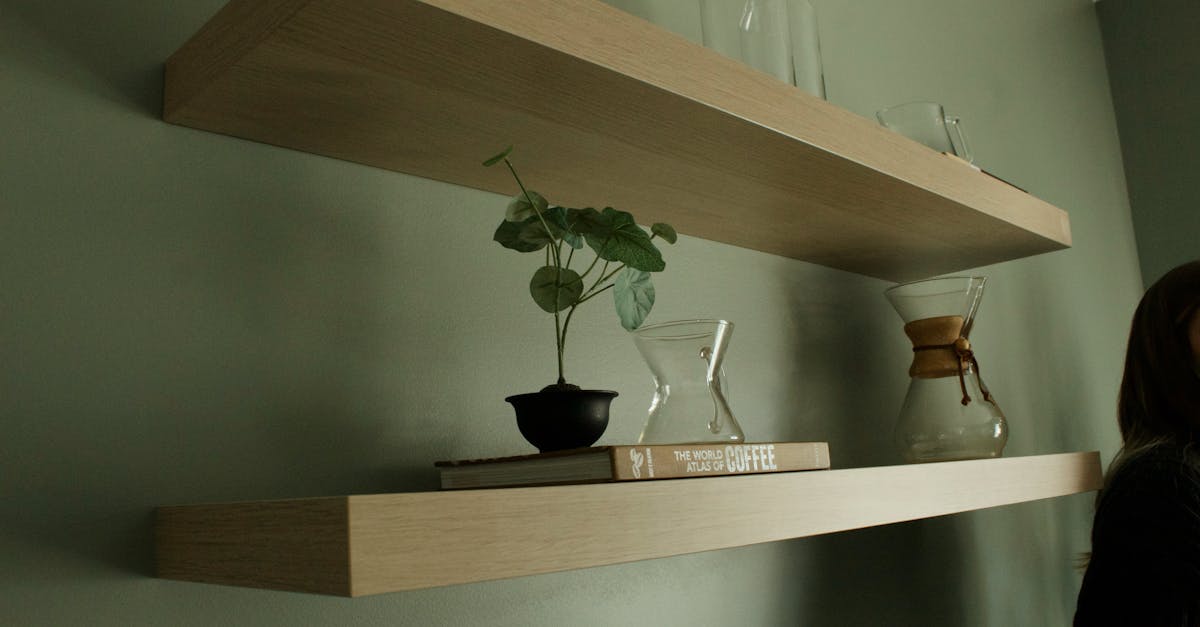
I remember the first time I proudly installed a set of DIY floating shelves in my living room. They looked sleek, modern, and absolutely perfect for displaying a few books and a potted plant. For about two weeks. Then, a subtle but unmistakable dip started to appear. First, it was barely noticeable, a slight curve in the middle. Within a month, it was an obvious sag, making my carefully curated decor look like it was sliding off a ski jump. My pride quickly turned into frustration, then into a deep dive into what exactly went wrong and how to fix it without starting from scratch. I’ve since learned that this isn’t just a beginner’s mistake; it’s a common failing of many DIY floating shelf projects, even those by seasoned renovators.
The truth is, most online tutorials and Pinterest inspiration boards skip over the critical engineering principles that make a floating shelf truly ‘float’ without eventually giving way. They show you the pretty end result but gloss over the hidden forces of gravity, leverage, and material fatigue that are constantly at play. In my experience, the biggest mistake people make is underestimating the load, overestimating their materials, and picking the wrong mounting hardware for the job. It’s a trifecta of structural vulnerability that leads to those disheartening sags.
Key Takeaways
- Most DIY floating shelves sag due to insufficient internal support and improper wall anchoring, not just excessive weight.
- Always choose solid wood or reinforced engineered wood for the shelf itself and use heavy-duty steel rods or continuous cleat systems for internal support.
- Never rely on drywall anchors alone; always secure at least two, preferably more, anchor points directly into wall studs for maximum stability.
- Consider the shelf’s length and anticipated load to determine the necessary support points, adding extra bracing for spans over 36 inches.
The Fatal Flaw: Inadequate Internal Shelf Support
When I first started, I thought a piece of MDF or particle board, even thick stuff, would be sufficient for a floating shelf. Coupled with a basic floating shelf bracket, I figured the internal structure would take care of itself. This is the first, and often most critical, mistake I see people make. The material you choose for the shelf itself, and how it’s internally supported, is paramount. Imagine a bridge: it’s not just the pillars that hold it up, but the engineered strength of the bridge deck itself. A floating shelf is no different.
My first sagging shelf was made from 3/4-inch MDF. While seemingly rigid on its own, MDF has very little structural integrity over a span when subjected to continuous downward pressure. It’s great for cabinet boxes or flat surfaces where it’s fully supported, but terrible for unsupported spans. The fibers compress and deflect over time. What changed everything for me was understanding the role of continuous internal support and material selection within the shelf body itself.
Instead of just a hollow core or a single piece of less dense material, a truly robust floating shelf needs to either be solid wood (like a hefty 2x6 or 2x8 piece of lumber) or an engineered structure that distributes the load internally. For my second attempt, I built a ‘torsion box’ style shelf out of plywood, essentially a hollow box with internal ribs that create a much stronger structure for its weight. Alternatively, for a simpler approach, using a thick, solid piece of hardwood (like oak or maple) will provide inherent stiffness. If you’re going for a hollow shelf look, you must integrate steel reinforcing bars or a continuous wood cleat system internally that spans the entire length of the shelf and is securely attached to the wall brackets. This prevents the shelf material itself from bowing between the bracket points.
The Myth of ‘Strong Enough’ Brackets and Anchors
Most people, myself included in my early days, focus heavily on the ‘floating shelf bracket’ they buy. We assume if the bracket looks robust, it is robust. The reality is far more nuanced. A bracket is only as strong as its weakest link, and often that link is how it’s attached to the wall, or how the shelf attaches to the bracket. I’ve seen countless installations where beautiful, heavy-duty steel rods are used, only to be inserted into flimsy drywall anchors.
The mistake I see most often is failing to hit at least two, and ideally all, wall studs with the bracket. Drywall anchors, even the toggle bolt variety, have a finite shear strength. They are designed for static loads like hanging pictures, not dynamic, leveraged loads like a floating shelf. A shelf loaded with books creates immense leverage, essentially trying to pry the anchor out of the wall. When I installed my first shelves, I was so focused on placement that I only hit one stud and used a couple of heavy-duty drywall anchors for the rest. Predictably, the drywall around those anchors eventually started to crumble, leading to the sag.
What actually works is meticulous planning. Before you even think about drilling, use a reliable stud finder to map out every stud along your desired shelf length. Mark them clearly. Then, choose a bracket system that allows you to secure at least two, but preferably three or more, attachment points directly into these studs. For longer shelves (over 48 inches), I will even consider adding a third or fourth bracket point, or designing a continuous French cleat system that distributes the weight across many studs. If you absolutely cannot hit enough studs (e.g., a very short wall), consider a different style of shelf, or a bracket system that is explicitly designed for no-stud installation and has extremely high weight ratings – but be warned, these are rare and usually quite visible.
The Unseen Villain: Leverage and Span-to-Support Ratio
It’s not just the total weight on the shelf; it’s how that weight is distributed and the sheer length of the unsupported span. Imagine holding a heavy book close to your body versus holding it out at arm’s length. The latter feels much heavier due to leverage. A floating shelf operates on the same principle. The further the weight is from the wall, and the longer the shelf, the greater the downward force at the unsupported ends.
My initial shelves were 48 inches long with only two internal support rods placed about 30 inches apart. This left 9 inches of unsupported shelf on either end, creating significant leverage points. Even a small decorative item placed at the far end of the shelf could exert a surprising amount of force, contributing to the sag over time. This is a crucial concept that many DIYers overlook: the span-to-support ratio.
What changed everything for me was learning to calculate and respect the optimal span-to-support ratio. For most floating shelf systems, especially with solid wood shelves, aim for support points every 16-24 inches. For longer shelves, this often means you need more than two support points. If your shelf is 60 inches long, you’re likely going to need at least three internal brackets/rods, ideally spaced at 20-inch intervals, all secured into studs. If using a continuous French cleat system, the cleat itself acts as a continuous support, but its attachment to the wall still needs to be every 16 inches (into studs).
Also, consider the depth of your shelf. A deeper shelf (e.g., 12 inches deep) creates more leverage than a shallower one (e.g., 6 inches deep) for the same weight. If you’re planning a very deep shelf, you’ll need an even more robust internal structure and stronger wall anchoring to counteract this increased leverage.
Overlooking Material Fatigue and Environmental Factors
Finally, the silent killer of many DIY floating shelves is material fatigue and environmental factors. Wood, even solid wood, is a natural material that responds to its environment. Changes in humidity and temperature can cause it to expand, contract, and warp over time. Engineered wood products like MDF and particle board are even more susceptible to moisture damage, which can weaken their structure and lead to sagging.
My first shelf was in a room that experienced significant temperature swings and occasional humidity spikes. While I didn’t initially attribute the sag to this, I’ve since learned that these factors contribute to the long-term degradation of materials, especially those not properly sealed or chosen for stability. MDF, for example, will absorb moisture from the air, swell, and lose its rigidity, making it more prone to sagging under load.
What I do now is always select materials that are stable for the intended environment. For solid wood shelves, I prefer kiln-dried hardwoods and always seal them thoroughly with a good quality poly or varnish to protect against moisture fluctuations. For hollow shelves, I use high-quality plywood (preferably marine-grade if in a high-humidity area like a bathroom). I also design with long-term stability in mind, choosing thicker materials and more robust joinery than I think I’ll initially need. Remember, a shelf that feels sturdy on day one needs to feel just as sturdy five years later. It’s about building for longevity, not just initial aesthetics.
Frequently Asked Questions
Q: Can I really install floating shelves without hitting any studs?
A: While some specialized heavy-duty toggle anchors claim to hold significant weight in drywall, relying solely on them for floating shelves is risky, especially for long shelves or those carrying heavy items like books. The shear strength might be there, but the leverage created by a loaded shelf often causes the drywall itself to fail over time. For maximum stability and peace of mind, always aim to secure your brackets into at least two wall studs.
Q: What’s the best material for a DIY floating shelf to prevent sagging?
A: Solid hardwood (like oak, maple, or walnut) is generally the best choice due to its inherent strength and rigidity. For a lighter, hollow shelf, a well-constructed plywood torsion box design with internal bracing provides excellent strength-to-weight. Avoid MDF or particle board for long unsupported spans, as they are prone to sagging and moisture damage.
Q: How many brackets do I need for a floating shelf?
A: A good rule of thumb is to have support points (brackets or rods) every 16-24 inches. For a typical 48-inch shelf, this means at least three support points are ideal, all secured into wall studs. Longer shelves will require more support points to prevent sagging from leverage and material fatigue.
Q: My floating shelf is already sagging. Can I fix it?
A: It depends on the extent of the sag and the original installation. If the shelf itself is bowing, you might need to replace it with a stronger material or reinforce it internally. If the sag is due to loose wall anchors, you may be able to re-anchor the existing brackets into studs (if available) or use a more robust anchoring system. In some cases, adding an inconspicuous corbel or small decorative bracket underneath the sagged area can provide additional support and hide the issue, though this defeats the true ‘floating’ aesthetic.
Q: How much weight can a typical DIY floating shelf hold?
A: There’s no single answer, as it depends entirely on the shelf material, thickness, depth, length, bracket type, and most importantly, how many anchor points hit wall studs. A well-designed, solid hardwood shelf with multiple stud-mounted steel rod brackets can hold 50-75 lbs per linear foot. A poorly designed shelf using MDF and drywall anchors might struggle to hold 10-15 lbs before showing signs of stress. Always over-engineer for the load you anticipate.
Building truly ‘floating’ shelves that defy gravity and stay perfectly level for years requires a bit more foresight and engineering than most DIY tutorials let on. My journey from a sagging display of books to rock-solid shelves taught me the critical importance of material science, meticulous anchoring, and understanding the physics of leverage. Don’t make the same mistakes I did. Take the extra time to choose stable materials, hit every stud you can, and provide ample, continuous internal support. Your decor (and your sanity) will thank you for it.
Written by David Chen
DIY Projects & Furniture Restoration
A master carpenter and upcycling enthusiast, David transforms forgotten items into functional art.
You Might Also Like

Why Your DIY Furniture Restoration Looks Amateurish (And What Actually Works)
Discover the hidden reasons your DIY furniture restoration projects fall short and the expert techniques to achieve professional, lasting results.

Why Your DIY Furniture Paint Job Looks Streaky (And What Actually Works)
Stop streaky, uneven furniture paint jobs. Learn the counter-intuitive techniques and overlooked prep steps that professional restorers use for a flawless finish.

The 5 Costly Mistakes People Make When Building DIY Built-In Shelves (And How I Learned to Avoid Them)
Don't ruin your DIY built-in shelves! Learn from my hard-won experience and avoid these 5 common, costly mistakes to get professional results.