
Why Your DIY Furniture Paint Job Looks Streaky (And What Actually Works)
You’ve spent hours sanding, taping, and meticulously applying what you hoped would be a beautiful, factory-smooth coat of paint to that vintage dresser or thrifted console table. You step back, excited to see your vision come to life, only to be met with a frustrating reality: streaks, brush marks, uneven patches, and a finish that screams “DIY disaster.” I’ve been there more times than I care to admit, especially in my early days of furniture restoration. It’s disheartening to put in all that effort, only to achieve a result that looks worse than when you started. You’ve followed what seem like straightforward instructions, bought decent paint, and used new brushes, yet the perfect finish remains elusive. Most people blame the paint or their technique, but in my experience, the real culprits are often subtle omissions and misconceptions in the preparation and application process that can make or break your project.
Key Takeaways
- Inadequate surface preparation, especially skipping degreasing, is the primary cause of poor paint adhesion and streaking.
- The wrong primer—or skipping it entirely—leads to uneven color, bleed-through, and a patchy final coat.
- Using incorrect paint application techniques, such as overloading the brush or applying too many thin coats, actually exacerbates streaking and brush marks.
- Rushing the drying and curing process between coats is a common mistake that compromises the durability and smoothness of the finish.
The Overlooked Power of Degreasing (It’s Not Just About Sanding)
When I first started restoring furniture, I thought sanding was the be-all and end-all of surface prep. I’d meticulously sand, wipe away dust, and then jump straight to priming. And I’d consistently get streaky results, especially with light-colored paints over darker wood. It took me years, and countless frustrating do-overs, to realize the critical step I was missing: thorough degreasing. This isn’t just about visible grime; it’s about the invisible residues that cling to furniture surfaces – hand oils, furniture polish, cleaning product buildup, and even airborne grease from kitchens.
Think about it: most old furniture has accumulated decades of these invisible contaminants. Sanding alone doesn’t remove them; it often just pushes them around, embedding them deeper or creating microscopic valleys for them to hide in. When you then apply paint, these residues act as a barrier, preventing the paint from properly adhering. The result? Poor adhesion, which manifests as streaks, uneven coverage, and sometimes even paint peeling or flaking off down the line. It’s like trying to stick a command hook to a greasy wall – it simply won’t hold.
My process now always includes a dedicated degreasing step before sanding. I use a 50/50 mixture of denatured alcohol and water, or a specialized degreaser like TSP (trisodium phosphate) substitute, applied with a clean rag. I wipe down every inch of the piece, then immediately follow with a clean, damp cloth to remove any residue from the degreaser itself. You’ll be amazed at the amount of ‘clean’ dirt that comes off. This ensures you’re working with a truly clean surface, allowing your primer and paint to bond properly and eliminating one of the biggest culprits of streaky finishes. Don’t just wipe; really scrub, especially in nooks and crannies. This single step can elevate your results from amateur to professional, guaranteeing a much smoother and more durable finish that is far less prone to streaking.
Why Your Primer Choice is Sabotaging Your Topcoat
Many DIYers treat primer as an optional step or a generic one-size-fits-all product. This is a monumental mistake that directly contributes to streaky paint jobs, especially when changing a dark piece to a light color or working with stained wood. I’ve seen countless projects where someone applies three coats of white paint over a dark cherry dresser, only to still see faint streaks of red or brown peeking through. They assume more topcoat will fix it, but it rarely does and often just creates a thick, gummy finish.
Primer’s job isn’t just to provide a sticky surface for the paint; it’s a specialized product designed to block stains, seal porous surfaces, and create a uniform, neutral base. Skipping primer or using the wrong type means your topcoat has to work harder, trying to do the primer’s job while also providing color and finish. This often results in the paint being absorbed unevenly, leading to patchiness and those dreaded streaks.
Here’s my rule of thumb: If you’re painting over previously stained wood (especially red-toned woods like mahogany or cherry) or laminate, you must use a stain-blocking, oil-based, or shellac-based primer. Water-based primers, while easier to clean up, often don’t have the same blocking power and will let tannins and stains bleed through, creating visible streaks that show through even multiple topcoats. My go-to is Zinsser B-I-N Shellac-Base Primer for extreme blocking, or Zinsser Bulls Eye 1-2-3 for general purpose, especially when adhesion is a concern over slick surfaces.
Apply two thin, even coats of primer, allowing adequate dry time between them. The primer should fully obscure the original finish. If you can still see the old color or wood grain after priming, you need another coat of primer, not more topcoat. Getting the primer right sets you up for success; skimping on it guarantees a streaky, uneven final result that will frustrate you no end.
The Counter-Intuitive Truth About Paint Application (Less is Often More)
This is where most people get it wrong. They believe that applying a thick coat will cover better and faster, or that super thin coats are always best. In reality, both approaches often lead to streaky, uneven results. A thick coat can cause drips, uneven drying, and visible brush marks that are impossible to smooth out. Conversely, too many super-thin coats can actually build up inconsistently, creating texture differences and visible lines, especially if you’re not meticulous about your overlap.
The sweet spot is applying medium, even coats using the right tools and technique. My general philosophy is fewer, perfectly applied coats are better than many sloppy ones. Here’s what I’ve learned makes the biggest difference:
- The Right Brush/Roller: Invest in high-quality synthetic brushes (angled sash brushes are great for detail) and foam rollers for smooth surfaces. Natural bristles absorb too much water from water-based paints and can leave visible marks. Cheap brushes shed bristles and apply paint unevenly. For rollers, look for high-density foam or micro-flock rollers specifically designed for smooth finishes. A 4-inch foam roller is my best friend for large flat surfaces.
- Load Your Brush/Roller Correctly: Don’t overload. Dip about 1/3 of the brush bristles into the paint, tap off excess on the side of the can, but don’t wipe it completely clean. For rollers, roll it in the tray until it’s evenly saturated but not dripping. Too little paint leads to dragging and uneven coverage; too much leads to drips and thick spots.
- Long, Overlapping Strokes: Apply paint in the direction of the wood grain (if applicable) using long, steady strokes. Work in small sections. For flat surfaces, think of a ‘W’ pattern with a roller, then fill it in. For brushes, lay the paint on in one direction, then lightly feather over it with the brush tip in the opposite direction (without reloading) to smooth out marks. The key is to maintain a wet edge—don’t let the paint dry as you’re working on an adjacent section, as this creates lap lines and streaks. This is why working in smaller, manageable areas is crucial.
- Don’t Overwork the Paint: This is probably the biggest mistake. Once you’ve applied the paint and smoothed it, leave it alone. Going back and brushing over partially dried paint will only create more streaks, drag marks, and an uneven texture. Trust the paint to self-level as it dries. This takes discipline, but it’s crucial for a smooth finish.
It’s a dance between applying enough paint for coverage and not so much that it becomes unmanageable. Practice on a scrap piece if you’re unsure. This refined application technique, combined with proper prep and primer, is the secret weapon against those frustrating streaks.
The Critical Importance of Patience (Why Rushing Ruins Everything)
We live in an instant gratification world, and painting furniture is often where that desire clashes violently with reality. I know the feeling – you want to see the finished product now. But rushing the drying and curing process between coats is a surefire way to introduce streaks, uneven texture, and ultimately, a less durable finish. This isn’t just about paint being dry to the touch; it’s about proper chemical curing.
Manufacturers provide ‘recoat times’ on paint cans, which are typically the minimum time before you can apply another coat without disturbing the previous one. They are not necessarily the time for full cure. If you recoat too soon, the solvents in the new paint layer can reactivate the partially cured layer beneath, causing it to drag, streak, or even pull up. This is especially true for oil-based paints or even some modern water-based enamels.
My rule of thumb is to double the recommended recoat time, especially in humid conditions or if the piece will see heavy use. If the can says 2 hours, I wait 4. If it says 4-6 hours, I wait overnight. And for a final coat, I let the piece cure for at least 72 hours, ideally a full week, before placing anything heavy on it or subjecting it to significant wear. While the paint might feel dry to the touch, it’s still chemically hardening beneath the surface. Rushing this process leads to:
- Streaking: The new coat’s brush/roller can drag or thin out the still-soft previous layer.
- Indentation Marks: Anything placed on the furniture too soon can leave a permanent impression.
- Reduced Durability: The paint won’t fully achieve its hardness, making it more susceptible to chips and scratches.
Temperature and humidity also play a huge role. Painting in high humidity will significantly extend drying times. Always check the manufacturer’s recommendations for ideal environmental conditions. If I’m painting in my garage in the middle of summer, I often run a dehumidifier. Investing in a small fan to keep air circulating (but not directly blowing on the wet paint) can also help. Patience is the ultimate virtue in furniture painting; it allows each layer to fully set, giving you a smooth, professional, and durable finish free from those frustrating streaks that scream ‘I rushed this’.
Frequently Asked Questions
Q: Why do I still see brush marks even after careful application?
A: Brush marks often stem from several issues: using the wrong type of brush (natural bristles for water-based paints are a common culprit), overloading the brush, overworking the paint by brushing over semi-dry areas, or insufficient paint flow/leveling. Ensure you’re using a high-quality synthetic brush, loading it adequately but not excessively, and making long, even strokes without going back over areas that have started to dry. Consider using a paint additive that improves flow and leveling for a smoother finish.
Q: My paint isn’t adhering well, and it’s easily scratching off. What went wrong?
A: This is almost always a surface preparation issue. Either the surface wasn’t properly cleaned and degreased before priming/painting, or you skipped primer entirely, especially on slick or challenging surfaces like laminate or previously sealed wood. The paint needs a clean, properly etched, and primed surface to bond to. Ensure you degrease thoroughly, sand to create ‘tooth,’ and use an appropriate adhesion-promoting primer.
Q: Can I use spray paint instead of brush/roller to avoid streaks?
A: Yes, spray paint (either from a can or using an HVLP sprayer) can often provide a smoother, streak-free finish due to its finer atomization and even application. However, it comes with its own challenges: proper ventilation, masking, and learning consistent spraying technique to avoid drips and runs. If you’re struggling with brush marks, a high-quality furniture-specific spray paint can be an excellent alternative, but practice on scrap material first.
Q: How many coats of paint do I really need?
A: After two coats of properly applied, stain-blocking primer, you typically need two to three thin, even coats of your topcoat for full, opaque coverage. The exact number depends on the paint’s opacity, the color change you’re making (dark to light requires more), and your application technique. Focus on achieving even coverage with each coat rather than blindly applying a set number. If you can still see the primer showing through, you need another coat.
Q: What’s the best way to clean my furniture before painting?
A: My preferred method is a two-step process. First, use a 50/50 mixture of denatured alcohol and water (or a TSP substitute) with a clean rag to thoroughly degrease and clean the surface. Follow immediately with a second clean rag dampened with plain water to wipe away any cleaner residue. Allow the piece to dry completely before sanding or priming. This ensures you’re starting with a truly clean surface, free of any invisible contaminants.
Achieving that perfectly smooth, streak-free furniture finish might seem like a dark art, but in reality, it boils down to meticulous preparation, understanding your materials, and most importantly, exercising patience. The mistakes I’ve outlined—skimping on degreasing, choosing the wrong primer, applying paint incorrectly, and rushing the drying process—are the most common culprits behind streaky DIY furniture projects. By integrating these specific, counter-intuitive steps into your routine, you’ll not only eliminate those frustrating streaks but also elevate the durability and professional appearance of your restored pieces. Next time you tackle a furniture project, remember: the magic is in the methodical, often unseen steps, not just in the final swipe of paint. Your patience will be rewarded with a finish that you’ll be proud to display.
Written by David Chen
DIY Projects & Furniture Restoration
A master carpenter and upcycling enthusiast, David transforms forgotten items into functional art.
You Might Also Like
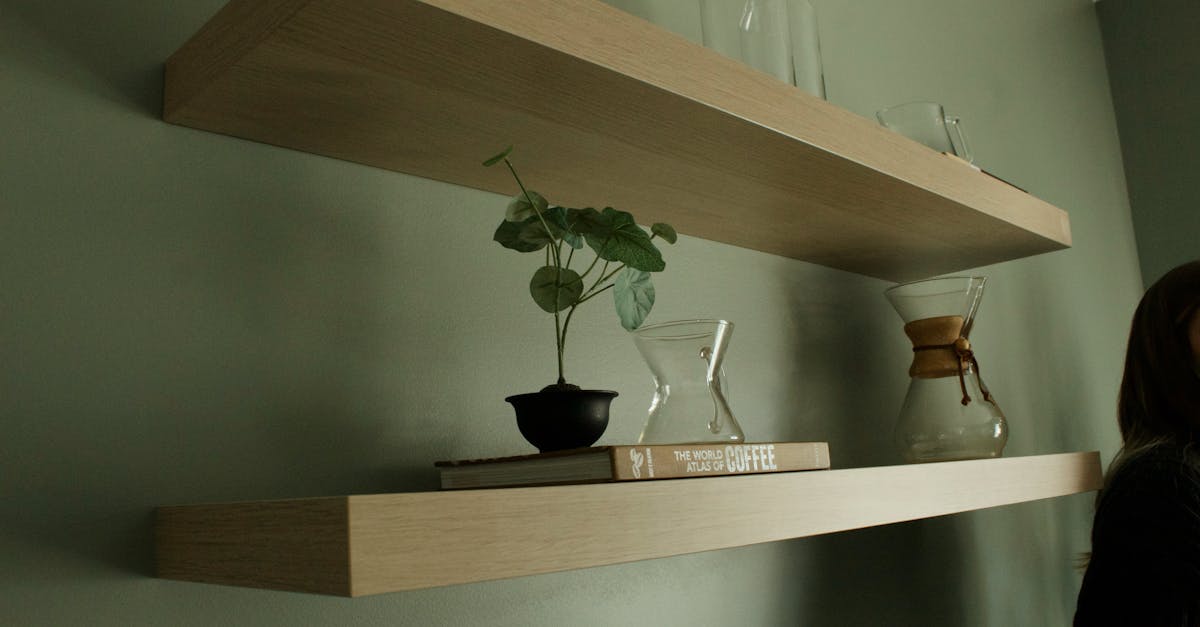
Why Your DIY Floating Shelves Sag (And What I Learned to Do Instead)
Discover why DIY floating shelves often sag and the counter-intuitive solutions to achieve sturdy, long-lasting results. Avoid common pitfalls!

Why Your DIY Furniture Restoration Looks Amateurish (And What Actually Works)
Discover the hidden reasons your DIY furniture restoration projects fall short and the expert techniques to achieve professional, lasting results.

The 5 Costly Mistakes People Make When Building DIY Built-In Shelves (And How I Learned to Avoid Them)
Don't ruin your DIY built-in shelves! Learn from my hard-won experience and avoid these 5 common, costly mistakes to get professional results.