Every spring, I see countless eager gardeners, full of dreams of fresh vegetables and vibrant flowers, embarking on their first DIY raised garden beds. And every summer, I hear the same laments: “My plants aren’t growing,” “The soil is always dry/soggy,” or “It just looks… sad.” The truth is, while a raised bed seems simple, there are subtle yet critical factors that often get overlooked, turning a promising project into a frustrating failure. I’ve built my fair share of successful, and frankly, unsuccessful, raised beds over the years. What I’ve learned is that it’s not just about building a box and filling it with dirt; it’s about understanding the ecosystem you’re creating.
Most online tutorials rush through the most vital parts, leaving you with a structure that looks good but performs poorly. In my experience, the biggest mistake people make is thinking that any soil will do, or that drainage is a secondary concern. These are the foundations of your garden’s success, and skimping on them is a guaranteed path to disappointment. I’ll share the crucial, often-missed details that actually make a difference, ensuring your DIY raised bed doesn’t just look good, but delivers a truly bountiful harvest.
Key Takeaways
- Don’t skimp on soil quality: A premium blend of topsoil, compost, and organic matter is non-negotiable for nutrient-rich growth, unlike generic garden soil.
- Prioritize proper drainage: Incorporate a gravel layer and ensure adequate weep holes to prevent waterlogging, which can suffocate roots.
- Choose durable, non-toxic materials: Opt for rot-resistant wood like cedar or recycled plastic lumber to ensure longevity and prevent chemical leaching.
- Consider bed dimensions carefully: Ideal bed width is 3-4 feet for easy access without stepping on soil, and height should be at least 10-12 inches for root development.
The Fatal Flaw: Your Soil Is a Dead End, Not a Life Source
This is, hands down, the most common and most devastating mistake I see in DIY raised garden beds. People spend money and effort building a beautiful wooden box, then fill it with whatever cheap garden soil or even native topsoil they can get. They think dirt is dirt, but it’s not. This isn’t just a minor oversight; it’s a fundamental misunderstanding of what plants need to thrive. I’ve been there, filling a new bed with what I thought was good enough only to watch my seedlings struggle, turn yellow, and ultimately, produce meager harvests. It changed everything for me when I realized that a raised bed is an opportunity to create ideal growing conditions, not just contain mediocre ones.
Your plants rely entirely on the soil in your raised bed for nutrients, water, and air. Generic garden soil is often too dense, lacking in organic matter, and deficient in the complex microbial life that healthy plants require. Native topsoil, while free, can be compacted, full of weed seeds, and may have an unfavorable pH or nutrient profile for vegetables. It’s like building a gourmet restaurant and then stocking the kitchen with stale bread and expired ingredients.
What Actually Works: Invest in a premium, custom-blended raised bed mix. Don’t just grab bags labeled garden soil off the shelf. I typically recommend a mix that’s roughly 50% high-quality topsoil, 30% aged compost, and 20% organic matter like peat moss or coco coir (if you’re avoiding peat). The compost provides a slow release of essential nutrients and introduces beneficial microbes. The organic matter improves soil structure, water retention, and aeration. This blend creates a rich, fluffy, living medium where roots can easily spread, absorb nutrients, and access oxygen. When I switched to this kind of blend, the difference in plant vigor, yield, and overall bed health was immediate and dramatic. It’s an upfront cost that pays dividends in produce.
The Silent Killer: Overlooking Drainage and Waterlogging Woes
Imagine trying to breathe underwater. That’s essentially what happens to your plant roots when your raised garden bed lacks proper drainage. It’s another crucial factor that often gets glossed over in DIY guides. Many beginners simply place their raised bed on existing soil or concrete, fill it up, and assume gravity will handle the rest. In my early days, I made this mistake, and the results were disastrous: stunted growth, yellowing leaves, and eventually, plants rotting at the base. It’s a heartbreaking sight when you’ve put so much effort in.
Waterlogging suffocates roots, leading to root rot and making plants vulnerable to diseases. Even if the topsoil feels dry, the lower layers can remain saturated, creating an anaerobic environment hostile to healthy root development. A poorly draining bed also flushes out nutrients faster, requiring more frequent fertilization and leading to overall weaker plants.
What Actually Works: You need a deliberate drainage strategy. First, if you’re building on concrete or a solid surface, you must have weep holes or gaps in the bottom of your bed structure. For beds placed directly on the ground, I always add a 4-6 inch layer of coarse gravel or small rocks at the very bottom, beneath a layer of landscaping fabric. The landscaping fabric prevents the soil from mixing with the gravel, but still allows water to pass through. This gravel layer creates an air gap and a clear path for excess water to drain away, preventing it from pooling around roots. Even with good soil, this crucial base layer makes all the difference in maintaining consistent moisture levels and preventing root suffocation. I’ve found that beds with this dedicated drainage layer are far more resilient to heavy rains and less prone to disease.
The Unseen Enemy: Choosing the Wrong Materials for Your Bed Structure
It’s tempting to use whatever wood is cheapest or most readily available when building a raised bed. I get it – budget constraints are real. But this is where many DIY projects falter, not just in aesthetics, but in the long-term health of your garden. I once used some leftover treated lumber from a deck project, thinking I was being smart and efficient. Within a year, the wood started to warp and crack, and I constantly worried about chemicals leaching into my organic vegetables. It was a false economy and a constant source of stress.
Certain materials rot quickly when constantly exposed to moist soil, meaning your beautiful bed will need replacement sooner than you think. More importantly, some treated woods contain chemicals (like CCA, chromated copper arsenate) that can leach into your soil and be absorbed by your plants. While many modern treated woods are safer, the potential risk and uncertainty are enough for me to avoid them entirely for edible gardens. Even untreated woods like pine or fir will succumb to rot much faster than you’d expect.
What Actually Works: Opt for durable, rot-resistant, and non-toxic materials. My top recommendation is cedar. It’s naturally rot-resistant, looks beautiful, and doesn’t contain harmful chemicals. While it’s a higher upfront cost, a well-built cedar bed can last 10-15 years or more, making it an excellent investment. Other good choices include recycled plastic lumber, which is incredibly durable and maintenance-free, or stone/brick, though these require more specialized building skills. If using untreated wood other than cedar, lining the inside of the bed walls with heavy-duty plastic sheeting (pond liner works well) can extend its life significantly, but ensure there’s no pooling between the liner and the wood. Always use stainless steel or galvanized fasteners to prevent rust and staining. I personally swear by cedar for its balance of natural resistance and aesthetic appeal; the beds I built with it years ago are still standing strong and productive.
The Cramped Quarters: Ignoring Bed Dimensions and Access Needs
Many first-time raised bed builders focus heavily on the construction of the box but pay insufficient attention to its usability and how it integrates with their gardening style. I’ve seen beds that are too wide to reach the middle, leading to compacted soil from leaning or stepping in, and beds that are too shallow for root vegetables. My own first bed was so wide I had to do an awkward dance around it just to prune tomatoes, compacting the soil near the edges and straining my back in the process. It was functional, but far from optimal.
Improper dimensions lead to several problems: you can’t reach the center of the bed without compacting the soil by stepping in it, which defeats a major advantage of raised beds. Too shallow, and plants like carrots, potatoes, or even deep-rooted tomatoes won’t have the space they need to develop fully. Too low, and you lose much of the ergonomic benefit that makes raised beds so appealing for reducing bending and kneeling.
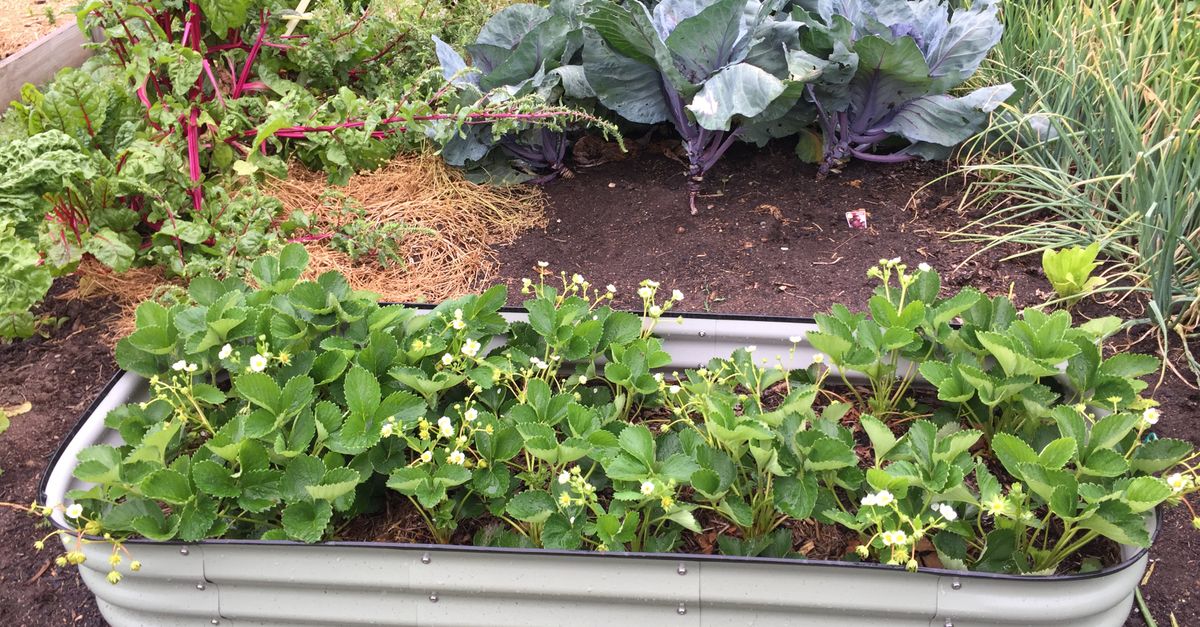
What Actually Works: Design your bed with accessibility and plant needs in mind. A crucial rule of thumb for width is no wider than 3-4 feet (approximately 0.9-1.2 meters). This allows you to reach the center comfortably from either side without stepping on the soil. For height, aim for at least 10-12 inches (25-30 cm) for most vegetables. This provides ample room for root development and a good volume of high-quality soil. If you plan to grow root crops like longer carrots or potatoes, consider 18-24 inches (45-60 cm). Taller beds (24-36 inches/60-90 cm) are fantastic for accessibility, especially for gardeners with back issues or mobility challenges, but they require more filling material. Remember that the sides of the bed are prime real estate for sitting, so designing a comfortable cap or edge can enhance usability significantly. My personal sweet spot for most applications is a 12-18 inch tall cedar bed, 3 feet wide, which balances soil volume, accessibility, and material cost perfectly.
Frequently Asked Questions
Q: Can I use old tires or railway sleepers for my raised garden bed?
A: I strongly advise against using old tires or railway sleepers for edible raised garden beds. Tires can leach heavy metals and other chemicals into your soil as they degrade, especially in direct sunlight. Railway sleepers are often treated with creosote, a toxic substance that can contaminate your soil and should not be used for growing food. Stick to new, untreated, food-safe materials like cedar, recycled plastic lumber, or natural stone for peace of mind.
Q: Do I need to put a barrier on the bottom of my raised bed if it’s directly on the ground?
A: Yes, I highly recommend adding a barrier. While some people skip this, a layer of hardware cloth (1/4 inch mesh) stapled to the bottom of your bed will prevent burrowing pests like gophers and voles from entering from below. Over that, lay down a layer of heavy-duty landscaping fabric to prevent weeds from growing up into your bed and to keep your expensive soil from mixing with the native soil, while still allowing for proper drainage.
Q: How often should I amend the soil in my raised bed?
A: Unlike in-ground gardens, raised beds have a contained soil volume, so it’s essential to amend regularly. I recommend adding a 1-2 inch layer of fresh, aged compost to the top of your bed every spring before planting. You can also work in some balanced organic fertilizer if your plants are heavy feeders. This replenishes nutrients, improves soil structure, and reintroduces beneficial microbial life, keeping your soil healthy and productive year after year.
Q: My raised bed gets full sun all day. How can I prevent it from drying out too quickly?
A: Full sun is great for many vegetables, but it does mean faster drying. I tackle this with a few strategies: first, ensure your soil mix has plenty of organic matter (like compost and coco coir) for water retention. Second, apply a 2-4 inch layer of organic mulch (straw, wood chips, shredded leaves) over the soil surface after planting. Mulch significantly reduces evaporation, moderates soil temperature, and suppresses weeds. Third, consider installing a drip irrigation system on a timer for consistent, efficient watering.
Q: Is it okay to use pressure-treated wood if it’s labeled ‘safe for gardens’?
A: While modern pressure-treated woods (like ACQ or Copper Azole) are considered safer than older CCA-treated lumber, I still exercise caution, especially for beds growing edible crops. The ‘safe for gardens’ label usually means it meets certain environmental standards, but some gardeners prefer to avoid any potential leaching of chemicals into their food-growing soil. If you choose to use it for structural reasons, I strongly recommend lining the interior of the bed walls with a heavy-duty, food-grade plastic liner to create a barrier between the treated wood and your soil, ensuring there’s a drainage gap between the liner and the bottom.
Building a successful raised garden bed isn’t rocket science, but it does require attention to a few crucial details that are often overlooked. By focusing on high-quality soil, robust drainage, smart material choices, and practical dimensions, you’ll set yourself up for years of abundant, homegrown produce. Don’t let common mistakes deter you from the joy of raised bed gardening. Take the lessons I’ve shared, apply them to your next project, and watch your garden flourish. Start planning your soil mix and drainage strategy today – your future harvests will thank you.